Web Scraper API
Fetch real-time data from 100+ websites,No development or maintenance required.
SCRAPING SOLUTIONS
Get accurate and in real-time results sourced from Google, Bing, and more.
With 120+ prebuilt and custom scrapers ready for any use case.
No blocks, no CAPTCHAs—unlock websites seamlessly at scale.
Execute scripts in stealth browsers with full rendering and automation
PROXY INFRASTRUCTURE
Over 100 million real residential IPs from genuine users across 190+ countries.
Reliable mobile data extraction, powered by real 4G/5G mobile IPs.
For time-sensitive tasks, utilize residential IPs with unlimited bandwidth.
Fast and cost-efficient IPs optimized for large-scale scraping.
SCRAPING SOLUTIONS
PROXY INFRASTRUCTURE
DATA FEEDS
Full details on all features, parameters, and integrations, with code samples in every major language.
LEARNING HUB
ALL LOCATIONS Proxy Locations
TOOLS
RESELLER
Get up to 50%
Contact sales:partner@thordata.com
Products $/GB
Fetch real-time data from 100+ websites,No development or maintenance required.
Get real-time results from search engines. Only pay for successful responses.
Execute scripts in stealth browsers with full rendering and automation.
Bid farewell to CAPTCHAs and anti-scraping, scrape public sites effortlessly.
Dataset Marketplace Pre-collected data from 100+ domains.
Over 100 million real residential IPs from genuine users across 190+ countries.
Reliable mobile data extraction, powered by real 4G/5G mobile IPs.
For time-sensitive tasks, utilize residential IPs with unlimited bandwidth.
Fast and cost-efficient IPs optimized for large-scale scraping.
Data for AI $/GB
Pricing $0/GB
Docs $/GB
Full details on all features, parameters, and integrations, with code samples in every major language.
Resource $/GB
EN $/GB
产品 $/GB
AI数据 $/GB
定价 $0/GB
产品文档 $/GB
资源 $/GB
简体中文 $/GB
<–!>
<–!>

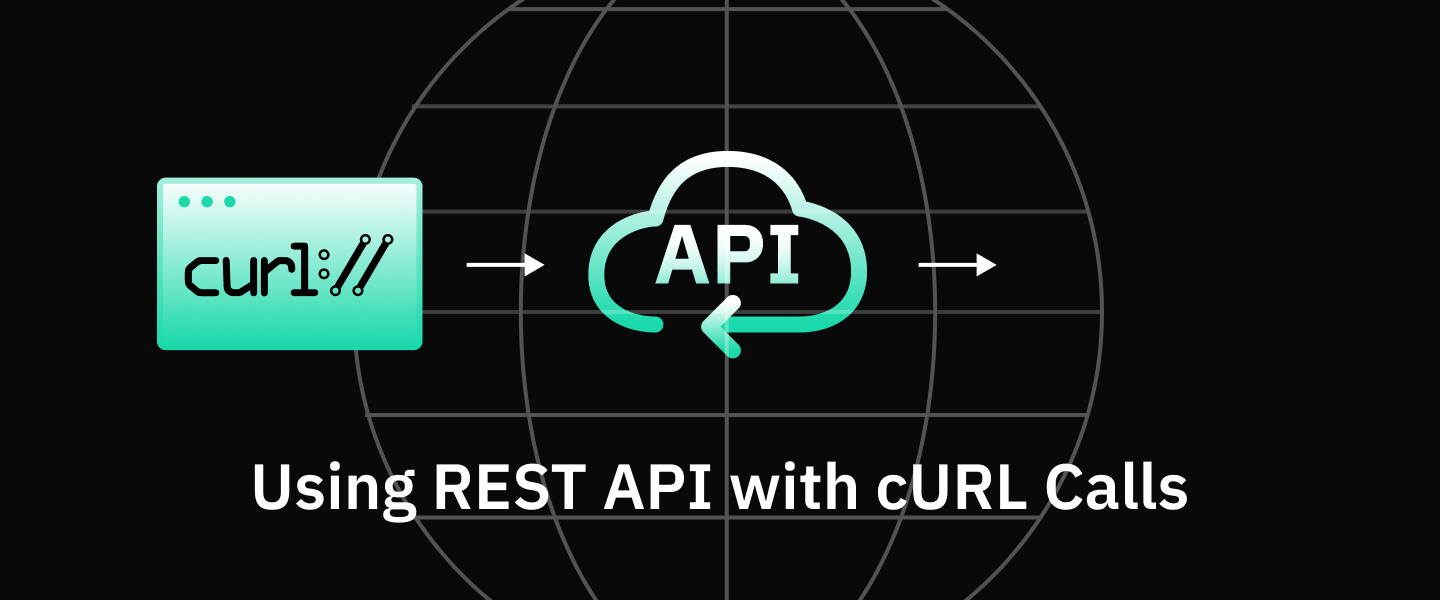
In modern software development and data interaction scenarios, curl with REST API has become one of the most reliable and efficient command-line tool combinations for developers. REST API defines the communication rules between services, while cURL acts as a precise and controllable request executor. In this article, we will take you in-depth to understand how to use cURL to call REST API, and further explore how to combine cURL with Web Unlocker, to help you stably and efficiently complete API calls and data acquisition in real business environments.
cURL is a cross-platform tool for transferring data in the command line and one of the infrastructures for developers to interact with the API world. It supports various protocols such as HTTP, HTTPS, and FTP, and is known for its high degree of control, allowing developers to send web requests directly from the terminal without relying on a graphical interface. cURL was originally developed by Daniel Stenberg and has now become the standard tool for testing APIs, downloading files, and debugging network issues, its scripting capabilities make automating tasks easy. cURL is primarily used in web scraping to test HTTP requests, such as sending GET requests and POST requests.
The core advantage of cURL lies in its flexibility and broad compatibility across operating systems. As the Mozilla Developer Network states, “cURL provides a low-level yet highly predictable way to interact with HTTP services.” In addition, cURL allows users to customize HTTP request headers, handle cookies, and debug output, enabling fine-grained control over requests. Whether in Linux, macOS, or Windows environments, cURL can provide consistent performance, enabling you to perform complex data operations through simple commands.
REST API is an architectural style based on the HTTP protocol for building scalable web services. It relies on stateless communication and standard HTTP methods (such as GET, POST, PUT, and DELETE) to manipulate resources, performing read, create, update, and delete operations on resources, usually returning data in JSON or XML format. This design emphasizes statelessness, scalability, and a uniform interface, making REST API the de facto standard for web services, SaaS platforms, and microservices architecture, and REST API with cURL is a common way to verify whether these interfaces comply with specifications. In practice, REST API allows developers to access and manipulate remote data via simple HTTP requests, thereby supporting a wide range of scenarios from mobile applications to cloud services.
Installing cURL is usually a straightforward process, as it is pre-installed or easily available on many operating systems. If you haven’t installed it yet, you can follow simple steps according to your platform to ensure the cURL command-line tool is available.
On Linux systems, cURL often comes as a default package, but if it is not available, you can quickly install it using a package manager.
Here is an example of installing cURL on Linux:
bash

sudo apt update
sudo apt install curl
For other operating systems, the installation method is similar. On macOS, cURL is usually pre-installed, but you can update or reinstall it using Homebrew. On Windows, you can download the binary from the official cURL website or use the Chocolatey package manager. After the installation is complete, it is crucial to verify that cURL has been installed correctly.
Use the following command to check if cURL has been installed successfully:
bash

curl --version
This command will display the version information of cURL, the protocols it supports, and the compilation options, confirming that the installation was successful. Make sure the system path is set correctly so that the cURL command can be used from any directory.
Using cURL to send REST API requests involves constructing command-line instructions that specify the HTTP method, URL, and optional parameters. The syntax of cURL is intuitive and powerful, allowing you to quickly test and debug API endpoints without writing full code. Below, we will delve into four core HTTP methods: GET, POST, PUT, and DELETE, and provide example code.
1. Send a GET request to REST API
GET requests are used to retrieve data from the server without modifying any resources. In the practice of REST API, the GET method is one of the most commonly used operations, corresponding to the "read" functionality of data, such as retrieving a list of posts, querying user information, or pulling a product catalog. Sending a GET request using cURL is very straightforward, as GET is the default method for cURL; you typically just need to provide a valid API endpoint URL.
To provide a real and immediately usable demonstration, we will use a popular public testing API: JSONPlaceholder. Assuming we need to retrieve a series of post data, the endpoint is located at https://jsonplaceholder.typicode.com/posts. This public service perfectly simulates the scenario of retrieving a collection of resources from a REST API.
Here is an example of a GET request:
bash

curl https://jsonplaceholder.typicode.com/posts
After executing this command, cURL will issue an HTTP GET request to the target server. The server typically returns a response with a status code of 200 OK, along with a JSON array containing the requested data. To observe the communication details more clearly, you can add the -i option to the command to include the response headers, which helps you understand the server's complete response, including content type and rate limit information. Our Senior Technical Copywriter has explored in detail the use of cURL to send GET requests in another article, including syntax, parameters, and examples. We encourage everyone to take a look to learn more.
json

[
  {
    "userId": 1,
    "id": 1,
    "title": "sunt aut facere repellat provident occaecati excepturi optio reprehenderit",
    "body": "quia et suscipit..."
  },
  {
    "userId": 1,
    "id": 2,
    "title": "qui est esse",
    "body": "est rerum tempore vitae..."
  }
]
2. Send a POST request to REST API
POST requests are used to submit data to a specified resource, typically resulting in a change in the resource's state on the server or the creation of a new resource. In the design of REST API, the POST method is central to performing the "Create" operation, common in submitting forms, uploading files, or adding a new record in a system, such as publishing a blog post or adding a new member to a user list. When sending a POST request using cURL, the key is to pass the data payload using the -d (or --data) option, and you typically need to use the -H option to set the correct Content-Type header to inform the server of the format of the data being sent.
To provide a coherent and verifiable practice, we will continue to use the public service JSONPlaceholder. Its /posts endpoint also accepts POST requests to simulate creating a new post. Although the service does not actually persist data in the backend, it returns a standard response containing a simulated generated ID, which is completely sufficient for learning and testing the POST behavior of the curl API.
POST request example code:
bash

curl -X POST https://jsonplaceholder.typicode.com/posts \
  -H "Content-Type: application/json" \
  -d '{
        "title": "My New Post via cURL",
        "body": "This is the content of the post sent using a REST API with curl command.",
        "userId": 1
      }'
When this request is processed and executed by the server, a typical successful response will include a status code of 201 Created, and return the complete object of the newly created resource in the response body, which will include a unique ID assigned by the server. This response confirms that the data has been received and processed, and is an important step in validating whether your curl programming logic is correct. Here is a sample of the response:
json

{
  "title": "My New Post via cURL",
  "body": "This is the content of the post sent using a REST API with curl command.",
  "userId": 1,
  "id": 101
}
Note: The "id": 101 in the response is the unique identifier simulated by the JSONPlaceholder service, which verifies the "success" of the create operation. By analyzing such a response, you can quickly confirm whether the API endpoint is functioning as expected and whether the structure of the data you sent is correct.
3. Send a PUT request to REST API
PUT requests are used to submit a complete resource representation to the server to update an existing resource at the specified URL. In REST API practice, the PUT method performs a "full update" operation, meaning the client needs to provide all fields of the resource (even if some fields remain unchanged), the server will completely replace the target resource with the provided data. This is commonly used in scenarios such as editing user profiles or modifying article content. Unlike POST, which creates new resources, PUT focuses on updating known resources and is idempotent.
Assuming we need to update the post with ID 1, the endpoint address is https://jsonplaceholder.typicode.com/posts/1. Note that in RESTful design, the URL for a PUT request typically needs to include the unique identifier of the resource to be updated.
PUT request example:
bash

curl -X PUT https://jsonplaceholder.typicode.com/posts/1 \
  -H "Content-Type: application/json" \
  -d '{
        "id": 1,
        "title": "Updated Post Title via cURL",
        "body": "This is the updated content of the post using a PUT request with curl.",
        "userId": 1
      }'
When the server processes this request, a successful handling typically returns a status code of 200 OK, and returns the updated complete resource object in the response body. This confirms that the resource has been successfully replaced. For some APIs, it may also return 204 No Content (no response body). By analyzing the response, you can verify whether the update has taken effect as expected. Response example:
json

{
  "id": 1,
  "title": "Updated Post Title via cURL",
  "body": "This is the updated content of the post using a PUT request with curl.",
  "userId": 1
}
4. Send a DELETE request to REST API
DELETE requests are used to request the server to delete the resource identified by the specified URL. In REST API, the DELETE method corresponds to the "Delete" operation, which is a key part of completing the CRUD functionality loop, commonly used to remove user accounts, delete articles, or cancel orders. Similar to GET requests, DELETE requests typically do not contain a request body, and the target resource is uniquely identified by the URL. DELETE operations are idempotent, meaning that sending the same delete request multiple times has the same effect as sending it once.
According to best practices in RESTful design, deleting a specific resource requires specifying its unique identifier (ID) in the endpoint URL. Thus, we set the target URL to https://jsonplaceholder.typicode.com/posts/1, which indicates that we want to delete the post with ID 1. Although the service does not actually delete data, it will return a simulated response that conforms to HTTP standards.
DELETE request example:
bash

curl -X DELETE https://jsonplaceholder.typicode.com/posts/1
After executing this command, cURL will send an HTTP DELETE request to the server. A successful delete operation typically returns a status code of 200 OK, and may accompany a response body describing the result of the operation; or more commonly, it returns a status code of 204 No Content, indicating that the request has been successfully processed, but there is no content to return in the response body.
Successful responses typically contain only the HTTP status line and header information, with no body content. For example, you may see output like the following in the terminal (which can be clearly viewed by adding the -i option):
text

HTTP/1.1 200 OK
...
{}
This simple response confirms that the delete instruction has been accepted by the server.
With this operation, you have completed the full practice of managing the lifecycle (create, read, update, delete) of REST API resources using curl API commands.
When you combine cURL with Web Unlocker, you can bypass geographic restrictions or IP blocks to access restricted REST APIs. Web Unlocker allows you to send requests through a vast global residential IP network, which not only hides your real IP address but also simulates the user identity of a specific country or region, thereby providing a stable and reliable access channel for data collection, API testing, and business integration.
Using Web Unlocker, you need to configure cURL to send requests through its proxy server and authenticate, also known as setting up a cURL proxy. This involves setting the proxy server address, port, and a complex authentication string containing your account information in the cURL command. Once configured successfully, all your cURL requests will be routed through Web Unlocker, making the target API believe the requests are coming from your specified geographic location.
To instruct cURL to use the Web Unlocker and simulate a German user, you need to specify the proxy parameters and authentication information in the command. After setting up Web Unlocker, it is essential to keep your username, zone name, and password secure, as they are necessary for establishing an authenticated connection.
cURL request example through Web Unlocker:
bash

curl -i --proxy na.thordata.net:9999 --proxy-user brd-customer--zone--country-de: -k “https://api.example.com/geo”
In this command, we use several key parameters:
• -i: This tells cURL to include the response headers in the output for easier debugging and viewing of the complete server response.
• --proxy na.thordata.net:9999: This indicates to cURL to route all traffic through the residential proxy server located at na.thordata.net:9999.
• --proxy-user brd-customer-YOUR_USERNAME-zone-YOUR_ZONE_NAME-country-de:YOUR_PASSWORD:: This is the complete authentication string. Its format is username:password. For Web Unlocker, your complete username includes all the following parts: brd-customer-YOUR_USERNAME-zone-YOUR_ZONE_NAME-country-de, where country-de explicitly specifies the use of the Germany exit node.
• -k: This option allows cURL to skip SSL certificate verification during connection. If you plan to use Web Unlocker long-term, you can download and install the SSL certificate here, which will enable your machine to authenticate the connection on its own, ensuring higher security.
The server will return a JSON response containing the German geographic location information of the proxy exit node. From the response's "country": "DE" and specific city information, you can confirm that the request was successfully sent through the German proxy. As you can see, our location is shown as Berlin.
json

{
  “country”: “DE”,
  “geo”: {
    “city”: “Berlin”,
    “region”: “BE”,
    “region_name”: “Berlin”,
    “latitude”: 52.5200,
    “longitude”: 13.4050
  }
}
cURL combined with REST API can be used for a variety of operations, from simple testing to complex automation. Its flexibility makes it a versatile tool in the development process, supporting various scenarios to help you improve efficiency and reliability.
Here are common uses of cURL in a REST API environment:
• Testing API endpoints: Validate the response time and data format of the REST API to ensure functionality.
• Debugging network issues: Check HTTP headers, status codes, and error messages to quickly locate communication failures.
• Automating data extraction: Regularly download data from the API and save it to a file for reporting or analysis.
• Integrating into CI/CD pipelines: Test API functionality during the deployment process to achieve continuous integration.
• Simulating client behavior: Send various requests to evaluate server performance and load handling capacity.
• Bypassing access restrictions: Use proxy servers to access geographically blocked APIs, expanding testing scope.
• Performance monitoring: Measure API latency and throughput to optimize system response.
• Security audits: Test the API’s authentication and authorization mechanisms to ensure data protection.
cURL provides a rich set of options to customize REST API requests, these options allow you to control various aspects of the request, from the method to the header information. The following table lists commonly used options and their descriptions to help you quickly grasp the key functionalities.
| Option | Description | Example |
-X |
Specify the HTTP method, such as GET, POST, PUT, DELETE | curl -X POST https://api.example.com |
-H |
Add HTTP headers, used for authentication or content type | curl -H "Authorization: Bearer token" https://api.example.com |
-d |
Send POST data, typically for JSON or form data | curl -d '{"key":"value"}' https://api.example.com |
-u |
Provide the username and password for basic authentication | curl -u username:password https://api.example.com |
-o |
Save output to a file instead of displaying it in the terminal | curl -o output.json https://api.example.com |
-v |
Enable verbose mode, showing detailed information about the request and response | curl -v https://api.example.com |
-x |
Send requests through a proxy server | curl -x http://proxy:port https://api.example.com |
-L |
Follow redirects and automatically handle 3xx status codes | curl -L https://api.example.com |
Although cURL is powerful, there are also alternative tools available, especially in graphical interfaces or specific programming environments. These tools offer different user experiences suited to various needs, allowing you to choose flexibly based on project characteristics.
Postman is a popular graphical API testing tool that allows users to build requests, save history, and manage collections through an interface. According to Postman’s official statement, "Postman simplifies each step of the API lifecycle," it supports team collaboration and automated testing, making it suitable for complex API development processes. For users who prefer visual operations, Postman can simplify the command line complexities of cURL, and provides advanced features like environment variables and testing scripts.
Other alternatives include HTTPie and Wget. HTTPie is known for its user-friendly syntax and colored output, while Wget focuses more on file downloads. In scripting scenarios, the built-in libraries of programming languages (such as the requests library in Python) also provide flexible options. Compared to cURL, these alternatives reduce the learning curve, however, cURL still has its unique advantages in cross-platform and lightweight aspects, making it irreplaceable in command line environments.
Mastering the skill of using cURL to call REST API is crucial for modern developers. From basic commands to advanced proxy configurations, cURL provides a comprehensive and efficient solution, allowing you to easily test, debug, and automate API interactions. In this article, we explored in depth the installation of cURL, the use of various request methods, and how to combine it with Web Unlocker to extend access capabilities. Whether testing, debugging, or automation, cURL can handle it all. With the growth of the API economy, becoming proficient in cURL will open up more possibilities for you, allowing you to navigate the field of web communications with ease.
We hope the information provided is helpful. However, if you have any further questions, feel free to contact us at support@thordata.com or via online chat.
<--!>
Frequently asked questions
Does curl work with HTTP?
Yes, cURL natively and comprehensively supports the HTTP/HTTPS protocols, which is its primary and most widespread application.
Can curl be used for API testing?
Yes, cURL is one of the industry standard tools for API testing, especially suitable for quickly verifying interface availability and debugging request headers and response bodies.
How to use curl for HTTP request?
The basic command format to initiate an HTTP request using cURL is curl [options] [URL]. For example, to execute a GET request: curl -X GET https://api.example.com/data.
How to call API using curl in Postman?
After configuring the request in Postman, click the "Code" button on the interface (usually next to the "Send" button), select "cURL" in the code generator on the sidebar to automatically generate the equivalent command code, which can be directly copied for use in the terminal.
<--!>
About the author
Anna is a content specialist who thrives on bringing ideas to life through engaging and impactful storytelling. Passionate about digital trends, she specializes in transforming complex concepts into content that resonates with diverse audiences. Beyond her work, Anna loves exploring new creative passions and keeping pace with the evolving digital landscape.
The thordata Blog offers all its content in its original form and solely for informational intent. We do not offer any guarantees regarding the information found on the thordata Blog or any external sites that it may direct you to. It is essential that you seek legal counsel and thoroughly examine the specific terms of service of any website before engaging in any scraping endeavors, or obtain a scraping permit if required.
 Looking for
Top-Tier Residential Proxies?您在寻找顶级高质量的住宅代理吗?
Looking for
Top-Tier Residential Proxies?您在寻找顶级高质量的住宅代理吗?
AI Data Collection Explained: Process, Examples, and Ethics
AI data collection is at the h ...
Kael Odin
2026-07-24

Afina Browser for Stable Proxy Workflows, Multi-Accounting and Web Automation
This guide explains how to thi ...
Jenny Avery
2026-07-23

Oxylabs vs Thordata — Which Residential Proxy Provider Wins in 2026?
Thordata has emerged as a comp ...
Kael Odin
2026-07-22

NetNut Is Down — Why Thordata Is the Reliable NetNut Replacement You Need
a reliable, fully operational, ...
Kael Odin
2026-07-22

Why Thordata Is the Smart Bright Data Alternative for Residential Proxies
If you're looking for a Bright ...
Kael Odin
2026-07-22

What residential proxy IP should I use for job posting and salary market intelligence?
Use a residential proxy IP whe ...
Xyla Huxley
2026-07-21

Which residential proxy IP should I use to monitor ESG registries and carbon credit public data?
Use a residential proxy IP whe ...
Xyla Huxley
2026-07-21

What residential proxy IP can help media companies verify streaming catalog availability by region?
Use a residential proxy IP whe ...
Xyla Hxuley
2026-07-21

Which residential proxy IP should I use for insurance quote QA without collecting private customer data?
Use a residential proxy IP for ...
Xyla Huxley
2026-07-21
